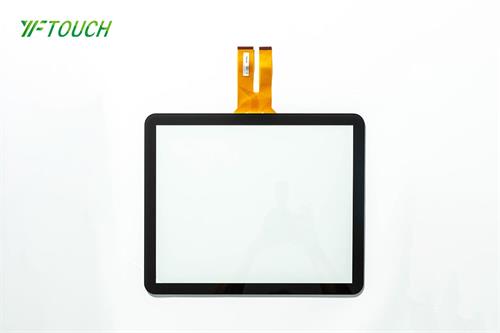
Installing a Multi-Touch Screen involves a systematic process to ensure optimal performance and functionality. Multi-Touch Screens have become integral components in various applications, from interactive displays to advanced computing systems. This installation guide outlines the step-by-step procedure for setting up a Multi-Touch Screen, emphasizing key considerations to enhance user experience and longevity.

Step 1: Unboxing and Inspection:
Begin by carefully unboxing the Multi-Touch Screen, checking for any visible damage during transit. Inspect the screen surface for scratches or blemishes. Verify that all accessories, including cables and installation manuals, are present. Prioritize a clean and organized workspace to avoid any potential damage during the installation process.
Step 2: Compatibility Check and System Requirements:
Ensure the Multi-Touch Screen is compatible with the intended device and operating system. Check the system requirements to confirm that the hardware and software specifications meet the manufacturer's recommendations. This step is crucial for seamless integration and optimal performance.
Step 3: Pre-Installation Setup:
Before mounting the Multi-Touch Screen, power off the connected device. If applicable, install any required drivers or software provided by the manufacturer. This step ensures that the device recognizes and utilizes the Multi-Touch functionality correctly. Follow the manufacturer's instructions for driver installation carefully.
Step 4: Mounting or Placement:
Determine the optimal placement or mounting position for the Multi-Touch Screen. Consider factors such as viewing angles, accessibility, and ambient lighting. Follow the provided guidelines or use the recommended mounting hardware for a secure and stable installation. Double-check alignment to prevent any issues during operation.
Step 5: Cable Connection:
Connect the necessary cables according to the provided instructions. Typically, Multi-Touch Screens utilize USB or HDMI connections. Ensure a secure and snug fit for each cable to prevent connectivity issues. If the screen requires external power, connect it to a reliable power source following the provided specifications.
Step 6: Calibration:
Calibrate the Multi-Touch Screen to optimize accuracy and responsiveness. Access the calibration settings through the device's operating system or provided software. Follow the on-screen instructions, typically involving tapping or touching specified points on the screen. Calibration fine-tunes the Multi-Touch functionality for precise interaction.
Step 7: Testing and Troubleshooting:
After installation and calibration, conduct thorough testing of the Multi-Touch Screen. Verify that all touch points are accurately registered, and gestures are responsive. If any issues arise, consult the troubleshooting section of the manual or contact the manufacturer's support for assistance. Addressing potential issues promptly ensures a smooth user experience.
Step 8: Final Configuration and User Guidelines:
Complete the installation process by configuring any additional settings based on user preferences. Provide clear user guidelines for interacting with the Multi-Touch Screen, emphasizing proper touch techniques and maintenance practices. Regularly update drivers and firmware to access the latest features and improvements.
By following these steps diligently, the installation of a Multi-Touch Screen can be executed smoothly, enhancing the overall usability and functionality of the device in various applications.
Copyright © 2026 Dongguan Yuefeng Optoelectronics Co., Ltd All rights reserved.